While sensitivity settings get most of the attention in pro gaming discussions, your HUD (Heads-Up Display) layout is arguably just as important — if not more so. The best sensitivity in the world will not help you if your fire button is in an awkward position, your scope button is too small to tap quickly, or your movement joystick is cramped in a corner.
In this comprehensive guide, we will walk you through everything you need to know about setting up the perfect custom HUD in FF MAX for the OB54 update. Whether you play with 2 fingers (thumbs only), 3 fingers, or the full 4-finger claw grip — this guide has a layout optimized for your playstyle.
Why Your HUD Layout Matters
Your HUD controls how accessible every action in the game is during combat. In a typical close-range firefight, you need to perform multiple actions simultaneously within 1-2 seconds:
- Move using the joystick
- Aim at the enemy
- Fire and drag for precision aim
- Jump or crouch for evasion
- Place a gloo wall
- Switch weapons
If any of these buttons is poorly positioned, you will experience a fraction-of-a-second delay that, in competitive play, often means the difference between winning and losing a fight. A well-designed HUD layout eliminates unnecessary finger movement and puts every critical button within natural reach.
Understanding Button Types
Before customizing your HUD, it is important to understand which buttons are essential and which ones you can deprioritize:
Critical Buttons (Must Be Easily Accessible)
- Fire Button: The most important button. Most pros use two fire buttons — one for hip fire (left) and one for ADS fire (right).
- Movement Joystick: Your left thumb's primary control. Should be large and comfortable.
- Gloo Wall Button: Essential for defensive plays. Must be quickly reachable without moving your thumb off the joystick.
- Scope/ADS Button: Controls when you aim down sights. Many pro players keep this near the fire button.
- Jump/Crouch Button: Used for J-Hop (Jump + Crouch combo) evasion tactics.
Secondary Buttons (Important But Less Urgent)
- Weapon Switch: Used between fights, not during them. Can be placed in a less prime location.
- Prone Button: Rarely used in aggressive play. Can be made smaller or placed away from the center.
- Map/Minimap: Useful for strategic play but not needed in mid-combat. Keep small and out of the way.
- Character Skill Button: Important but used periodically. Place where you can reach it without disrupting aim or movement.
- Reload Button: FF auto-reloads, so manual reload is only needed for specific situations.
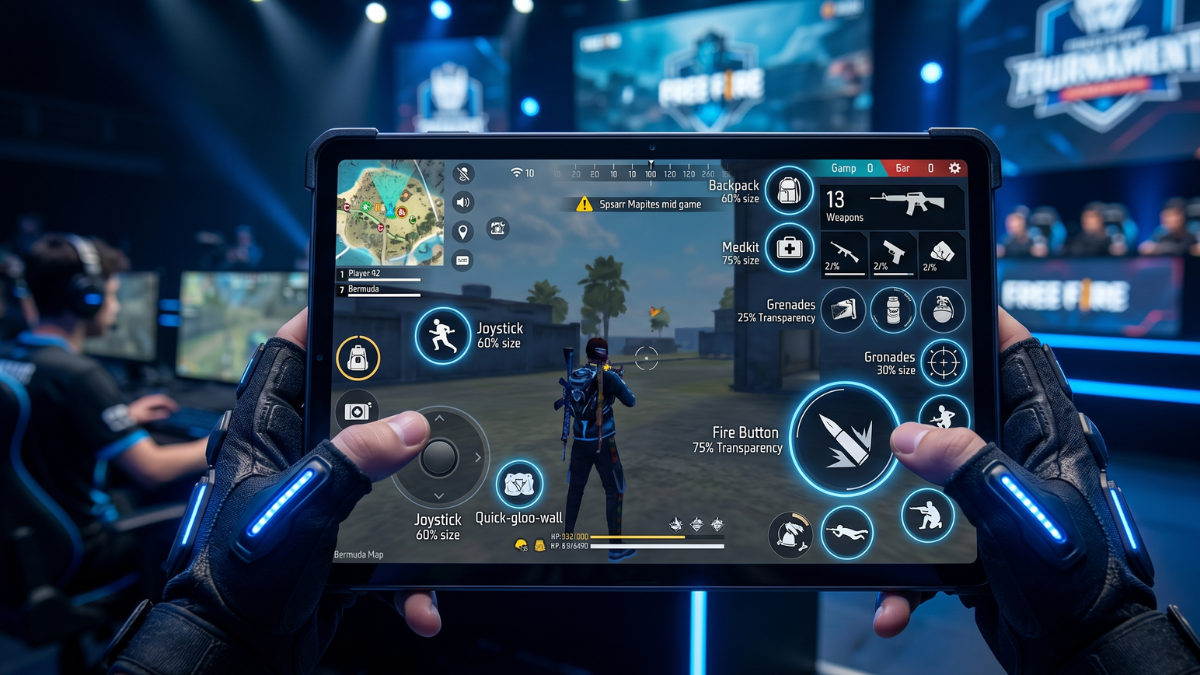
HUD Layout for 2-Finger (Thumbs Only) Players
Two-finger play is the most common setup for casual and beginner players. Since you are using only your thumbs, every button must be reachable from the bottom corners of the screen.
Layout Recommendations:
- Movement Joystick: Bottom-left corner. Set size to approximately 70-80% for comfortable thumb movement.
- Fire Button: Bottom-right corner. Use a single large fire button (size 80-90%). Place it where your right thumb naturally rests.
- Gloo Wall: Place directly above the fire button. This lets you quickly tap gloo wall without moving your thumb far from the fire button.
- Jump/Crouch: Place to the left of the fire button. Small size (50-60%) is sufficient.
- Scope Button: Place slightly above and to the left of the fire button.
- Weapon Switch: Top-right corner, out of the combat zone.
Pro Tip for 2-Finger Players: Enable "Auto Scope" in settings so you do not need to manually tap the scope button. This frees up your right thumb to focus entirely on firing and dragging for precision shots.
HUD Layout for 3-Finger Players
Three-finger play uses both thumbs plus one index finger (usually right hand). This setup significantly improves your ability to fire while moving simultaneously.
Layout Recommendations:
- Movement Joystick: Bottom-left corner (same as 2-finger).
- Primary Fire Button: Move to the top-right corner of the screen. Your right index finger handles firing, freeing your right thumb for aiming.
- Secondary Fire Button (Optional): Keep a smaller fire button in the bottom-right for hip-fire scenarios.
- Gloo Wall: Top-left corner, accessible by your left index finger if you switch fingers, or bottom-left area near the joystick.
- Jump/Crouch: Bottom-right, controlled by right thumb.
- Scope Button: Near the top-right fire button so your index finger can quickly scope and fire.
The key advantage of 3-finger play is simultaneous fire + aim. Since your index finger taps the fire button while your right thumb controls the camera, you can fire and adjust your aim at the same time — this is the foundation of the Drag Shot technique.
HUD Layout for 4-Finger Claw Players
Four-finger claw is the setup used by most professional and competitive FF players. Both index fingers are placed on the top of the screen while both thumbs handle the bottom. This gives you maximum simultaneous control.
Layout Recommendations:
- Movement Joystick: Bottom-left, controlled by left thumb. Size 65-75% (slightly smaller since your left index finger also helps).
- Left Fire Button: Top-left area, controlled by left index finger. This is your primary fire button for one-tap shots.
- Right Fire Button: Top-right area, controlled by right index finger. Use this for drag shots and ADS firing.
- Scope/ADS Button: Near the right fire button, top-right area. Right index finger manages both scope and fire.
- Gloo Wall: Left side, accessible by left index finger. Place it near the left fire button for quick wall placements during combat.
- Jump/Crouch: Bottom-right, controlled by right thumb. This lets you J-Hop while firing with your index fingers.
- Character Skill: Bottom-left or bottom-right, wherever your thumbs can comfortably reach during combat.
Important: Switching to 4-finger claw from 2-finger is extremely uncomfortable at first. Give yourself at least 2 weeks of consistent practice before judging whether claw works for you. Your hands need time to develop new muscle memory and comfort positions.
Button Size Guide
Button size matters more than most players realize. Here are our recommended sizes based on extensive testing:
| Button | 2-Finger | 3-Finger | 4-Finger |
|---|---|---|---|
| Fire Button | 85-95% | 70-80% | 60-70% |
| Joystick | 75-85% | 70-80% | 65-75% |
| Gloo Wall | 60-70% | 55-65% | 50-60% |
| Jump/Crouch | 55-65% | 50-60% | 45-55% |
| Scope | 50-60% | 50-60% | 45-55% |
Why smaller buttons for more fingers? With claw grip, you have more fingers available, so each individual button does not need to be as large. Smaller buttons also reduce the chance of accidental taps and give you more visible screen real estate during gameplay.
Common HUD Mistakes to Avoid
- Overlapping buttons: When buttons overlap, you misfire or accidentally crouch. Always leave a small gap between adjacent buttons.
- Fire button too close to the edge: If the fire button is at the very edge of the screen, your finger may slip off during intense moments. Move it slightly inward (5-10 pixels from the edge).
- Gloo wall too far from fire button: In an emergency, you need to switch from firing to placing a gloo wall instantly. If these buttons are on opposite sides of the screen, you lose critical time.
- Using the default HUD: The default HUD is designed for the most basic gameplay. Serious players should always create a custom layout tailored to their grip style and screen size.
- Changing HUD too frequently: Like sensitivity, your HUD requires muscle memory. Once you find a comfortable layout, stick with it for at least 2-3 weeks before making changes.
Pair Your HUD with Optimized Sensitivity
The perfect HUD layout is only half the equation. Your sensitivity settings determine how your crosshair moves when you swipe the screen. For the best results, we recommend using our Sensi Guru AI Generator to get device-specific sensitivity values that work perfectly with your new HUD.
Pro Recommendation: Set up your new HUD first, then generate your sensitivity. Practice with both together in Training Grounds for at least 30 minutes before playing ranked matches.
With the right HUD layout and optimized sensitivity settings, you will notice an immediate improvement in your reaction speed, aim accuracy, and overall gameplay confidence. Good luck, and we will see you on the battlefield!